

Quick Summary
Laser engraving on wood works by focusing a beam of light to vaporize the surface layer, burning the design into the grain without any physical contact. The machine moves the beam line by line, using more passes or power for darker areas. Testing settings on a scrap board first helps prevent scorching and blurred detail.
- The laser head never touches the wood, so there is no blade wear or pressure.
- Light woods like poplar and birch are usually best for photo-style engravings.
- Set focus on the wood surface, not the machine bed, and re-check after each material change.
- Run a nine-square test matrix varying power and speed before engraving the final piece.
- Always run an exhaust system and never leave the machine running unattended.
Table of Contents
- How Laser Engraving Works on Wood
- Choosing the Best Wood for Laser Engraving Photos
- Preparing Your Design File and Wood Surface
- Setting Up Wood Laser Engraving Settings
- Laser Engraving for Beginners: Test, Focus and Run
- How to Engrave Wood Safely: Ventilation and Fire Prevention
- Cleaning and Finishing Your Engraved Wood Piece
- Ordering a Custom Engraved Wood Sign From Gi Laser Art
- Frequently Asked Questions
How Laser Engraving Works on Wood
Last Updated: November 4, 2026
Laser engraving is the process of using a focused beam of light to remove the surface layer of wood, leaving a permanent mark. Laser engraving is one of the most reliable ways to add a personal touch to a piece of wood. The laser heats the surface until the wood vaporizes, so the design is burned into the grain rather than printed on top of it.
The process is noncontact. The laser head never touches the wood, which means there is no blade wear and no pressure that could crack a thin board. The machine moves the beam line by line across the design, much like a printer moves a head across paper. Darker areas get more passes or more power, while lighter areas get less.
Here is what happens during a typical engraving run:
- The laser beam focuses on a tiny spot on the wood surface.
- The surface heats quickly and turns to vapor, leaving a shallow cut.
- The machine moves to the next line and repeats.
- Smoke and fine residue are pulled out through an exhaust system.
Wood reacts differently from one board to the next.
Watch out: Engraving too deep or too slowly can scorch the surface and blur fine lines, so always test on a scrap first.
Choosing the Best Wood for Laser Engraving Photos
Light-colored woods such as poplar and birch are usually the best choice for photo-style engravings. They have a fine, even grain and a pale surface, so the burned areas show as clear shades of brown. Darker woods like walnut can look rich, but their contrast range is smaller, which makes fine detail harder to see.
Look for these qualities when choosing wood:
- A smooth, tight grain with few large knots
- A uniform color across the board
- A flat surface free of warping
- A finish that is sanded but not sealed with heavy coatings
Our How 'Bout Them Chiefs engraved poplar wood sign shows the natural wood grain beneath the detailed engraved design. Wood grain, knots, color, and engraving shade will vary naturally between signs.

Preparing Your Design File and Wood Surface
Start with a clean, high-resolution image. Most laser software reads black-and-white or grayscale files best, so convert your photo before importing it. Increase contrast so the dark and light areas are clearly separated, since small gray differences often disappear on wood.
Next, prepare the surface:
- Wipe the board with a dry cloth to remove dust.
- Sand lightly if the surface has raised grain or marks.
- Tape the edges down if the board is thin or warped.
- Measure the exact engraving area and set it in your software.
A common mistake is skipping the test on a scrap piece. Always run the same design on a spare board of the same wood first.
Setting Up Wood Laser Engraving Settings
Settings determine whether an engraving comes out crisp and readable or muddy and scorched. Three controls do most of the work: power, speed, and lines per inch (LPI). Power controls how much energy the beam delivers to each spot.
The interaction matters more than any single number. Doubling power and doubling speed does not produce the same result, because the beam spends less time per spot at higher speed even though it is hotter.
Use these starting ranges as a calibration baseline, not as final settings. They assume a diode or CO2 machine in the 40-80 watt range with a standard focus lens, and they will need adjustment for your specific machine, lens, and board.
| Wood type | Power | Speed | LPI | Notes |
|---|---|---|---|---|
| Birch plywood (1/8 in) | 30-40% | 40-60% | 300-400 | Even grain, forgiving for photos |
| Poplar (1/4 in) | 35-45% | 35-50% | 300-400 | Light surface gives strong contrast |
| Basswood (1/4 in) | 30-40% | 40-55% | 300-400 | Soft, darkens quickly; watch scorch |
| Walnut (1/4 in) | 45-60% | 25-40% | 250-350 | Dense; needs more power for contrast |
| MDF (1/4 in) | 25-35% | 50-70% | 300-400 | Engraves easily but produces heavy smoke |
| Oak (1/2 in) | 55-70% | 20-35% | 250-300 | Hard grain; slow speed for clean edges |
For text and line art, a wider LPI (around 250-300) often looks cleaner because the lines do not overlap and blur. For photo-style engraving, a finer LPI (350-500) packs more passes into the same area and produces smoother gradients.
Focus is the fourth setting, and it is the one beginners overlook. The beam is only sharp at one exact height. Most machines ship with a focus tool or height gauge; set it on the wood surface, not on the bed, and re-check it after every material change.
Air assist is a fifth variable worth treating as a setting. A steady air stream blows smoke and ash away from the cut zone, which reduces scorching and keeps the lens clean. On resinous woods, turning air assist up often does more for edge quality than any power adjustment.
Watch out: Turning power too high on soft woods like basswood or pine can char the surface and erase fine detail, so reduce power before you slow the speed.
Once you have a combination that works, record it. Note the wood species, thickness, power, speed, LPI, focus height, and air-assist setting in a log.
How ’Bout Them Chiefs — Engraved Poplar Wood Sign | 12″ × 18″ →
Laser Engraving for Beginners: Test, Focus and Run
A first engraving run should be boring. The goal is to remove surprises before they reach your final piece of wood. That means focusing correctly, running a structured test, reading the results, and knowing what to do when something goes wrong.
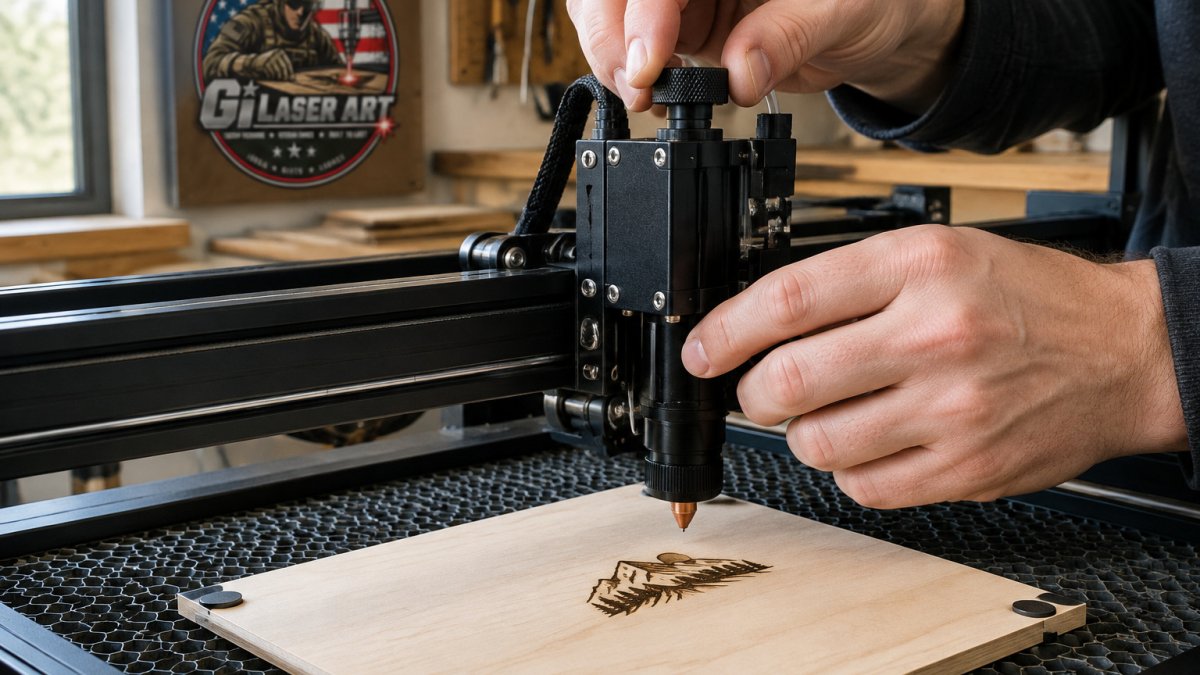
Step 1: Focus on the surface. Set the focus tool or height gauge on the wood itself, not on the machine bed. The beam is sharpest at one exact distance, and a beam that is slightly out of focus spreads out and blurs fine lines.
Step 2: Run a test matrix, not a single test square. A single square tells you whether one setting works. A matrix tells you which direction to move. Engrave a grid of small squares, typically nine, using three power levels and three speed levels around your starting point.
Step 3: Read the results. Look at each square under good light. You are judging four things: line sharpness (are edges crisp or fuzzy?), contrast (is the burned area clearly darker than the surrounding wood?), depth consistency (is the burn even across the square?), and residue (is there loose ash or a sticky tar ring?).
Step 4: Run the full design. Load the design, confirm the engraving area matches the measured board, and run it. Keep the exhaust running for the entire job and stay with the machine.
Step 5: Check before you finish. Inspect the piece under raking light, which reveals depth variation that flat lighting hides. Brush away loose ash before applying any finish.
When a result comes out wrong, the cause is usually one of a handful of patterns:
- Scorch marks or dark halos around the design. Power is too high, speed is too slow, or air assist is too low. Reduce power first, then increase speed, then increase air assist.
- Uneven depth across the board. The board is not flat, focus drifted, or the bed is not level. Re-focus on the surface and check for warp.
- Weak or washed-out contrast. Power is too low, LPI is too fine for the wood, or the wood is too dark to show a burn. Increase power slightly or switch to a lighter species.
- Smoke residue or sticky tar. Exhaust is insufficient or air assist is off. Clean the lens, check the exhaust path, and raise air assist.
- Flare-ups or small flames. Resinous wood, accumulated residue on the bed, or too much power at too slow a speed. Stop the job, clean the bed, and reduce power.
Watch out: Skipping the test matrix is the most common beginner mistake, a single test square confirms one setting works but does not tell you which direction to adjust when it does not.
Record the winning combination in a log with the wood species, thickness, and all settings. That log becomes your starting point for the next job and the foundation of repeatable results.
How to Engrave Wood Safely: Ventilation and Fire Prevention
Laser engraving burns material, so safety matters. Always run the machine with a working exhaust fan or air filter that vents outdoors. Smoke from burning wood contains fine particles and irritating gases, and you should never breathe it in for long periods.
Keep these safety habits in place:
- Never leave the machine running unattended.
- Keep a fire extinguisher rated for the type of fire you might face nearby.
- Remove sawdust and resin buildup from the bed regularly.
- Use an air assist if your machine includes one, since it blows away smoke and reduces scorching.
- Check the Occupational Safety and Health Administration guidance on workplace air quality if you run the machine at a business.
Some woods, especially those with high resin content, produce more smoke and flare more easily. Test these woods with extra caution.
Cleaning and Finishing Your Engraved Wood Piece
After engraving, brush away loose ash and residue with a soft brush or a dry cloth. For more guidance on choosing engraved gifts that hold up over time, see our guide to durable laser engraved gifts. For stubborn soot, a slightly damp cloth works, but dry the surface right away so the wood does not swell. Let the piece rest for a few hours before any finishing step.
Finishing protects the engraving and brings out the grain. Many people use a clear wood sealer or a light coat of oil. Test any finish on a scrap first, since some coatings can darken the engraved areas or lift the burned color.
Good finishing choices include:
- A matte water-based sealer for a natural look
- A thin coat of food-safe oil for cutting boards
- A clear spray lacquer for outdoor pieces, with proper ventilation
Ordering a Custom Engraved Wood Sign From Gi Laser Art
If you want the process done for you, Gi Laser Art creates custom engraved wood signs and name plates. Pricing is based on size, material, and design. To get started, use our custom engraved wood signs and name plates page to describe your idea and request a quote. No payment is required to submit a quote request, and all design details, pricing, and shipping costs will be agreed upon before payment is requested.
If you have a logo or image to include, mention it in your request so we can discuss the artwork with you. For ideas beyond our standard shop, you can also explore custom laser-engraved gifts. For ideas beyond our standard shop, you can also explore our custom orders page.
FAQ section will be added separately.
Frequently Asked Questions
How does laser engraving work on wood?
Laser engraving uses a focused beam of light to remove the surface layer of wood, leaving a permanent mark.
What types of wood are best for laser engraving?
Our [How 'Bout Them Chiefs engraved poplar wood sign](page:1) is made from poplar wood, and wood grain and color will vary naturally between pieces.
What laser settings should beginners use for wood?
Beginners should start with low power and moderate speed, then adjust in small steps. Run a test grid on scrap wood of the same species and thickness, changing only one value at a time, and record each result. Keep the focus height correct for your machine, because an out-of-focus beam produces blurry, weak engravings. Once you find settings that work for a species, note them so you can repeat the result on future pieces.
How do you clean and finish wood after laser engraving?
Brush away loose soot and debris with a soft brush, then wipe the surface with a damp cloth or mild cleaner to lift residue from the char. Let the wood dry fully before applying any finish. A light sanding with fine-grit paper can remove stubborn scorch on the surface, but avoid sanding through the engraved lines. Seal the piece with a clear wood finish, such as a water-based polyurethane, to protect it from moisture and handling wear.
